

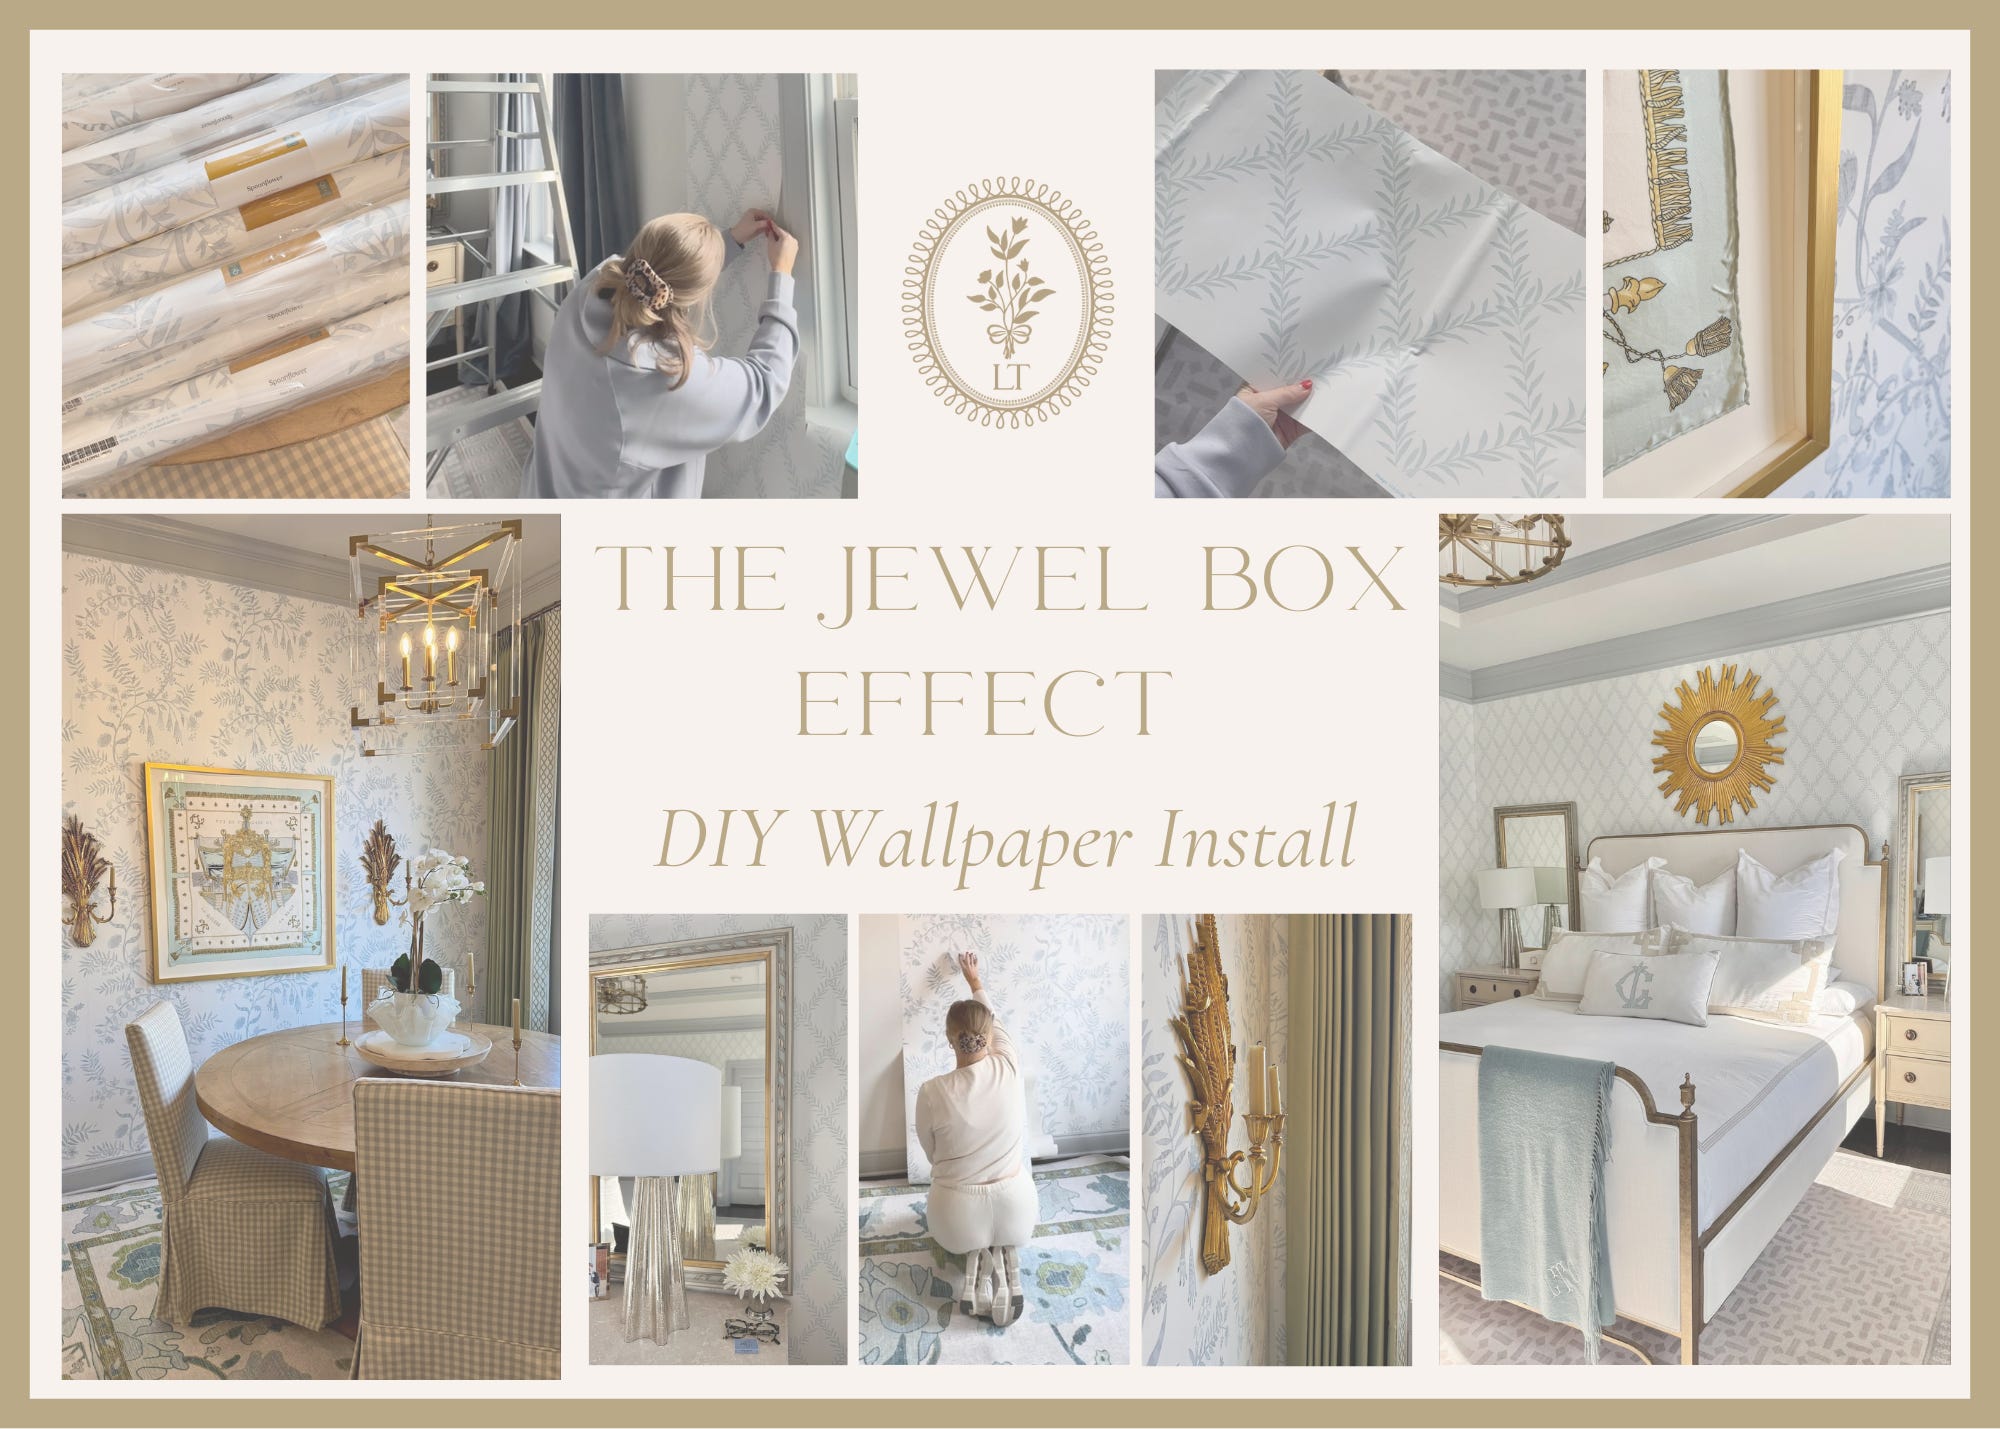
The Jewel Box Effect: DIY Wallpaper Install
My honest foray into peel & stick wallpaper — bubbles, breaks and all.

This post is created in partnership with Spoonflower. As always, all opinions, commentary, and strong feelings about creating a charming home are entirely my own.
I love the modern renaissance of wallpaper.
It makes a room feel like a jewel box — intentional, layered, and transportive. Especially in a traditional home where trim, millwork, and saturated paint colors deserve something equally thoughtful to play against.
But, for years, Carter put his foot down: “Too expensive.” “It’s just a fad.” “What happens when we sell?”
So, as a compromise, we decided to wallpaper the dining room and our primary bedroom! :)
Why We Partnered with Spoonflower
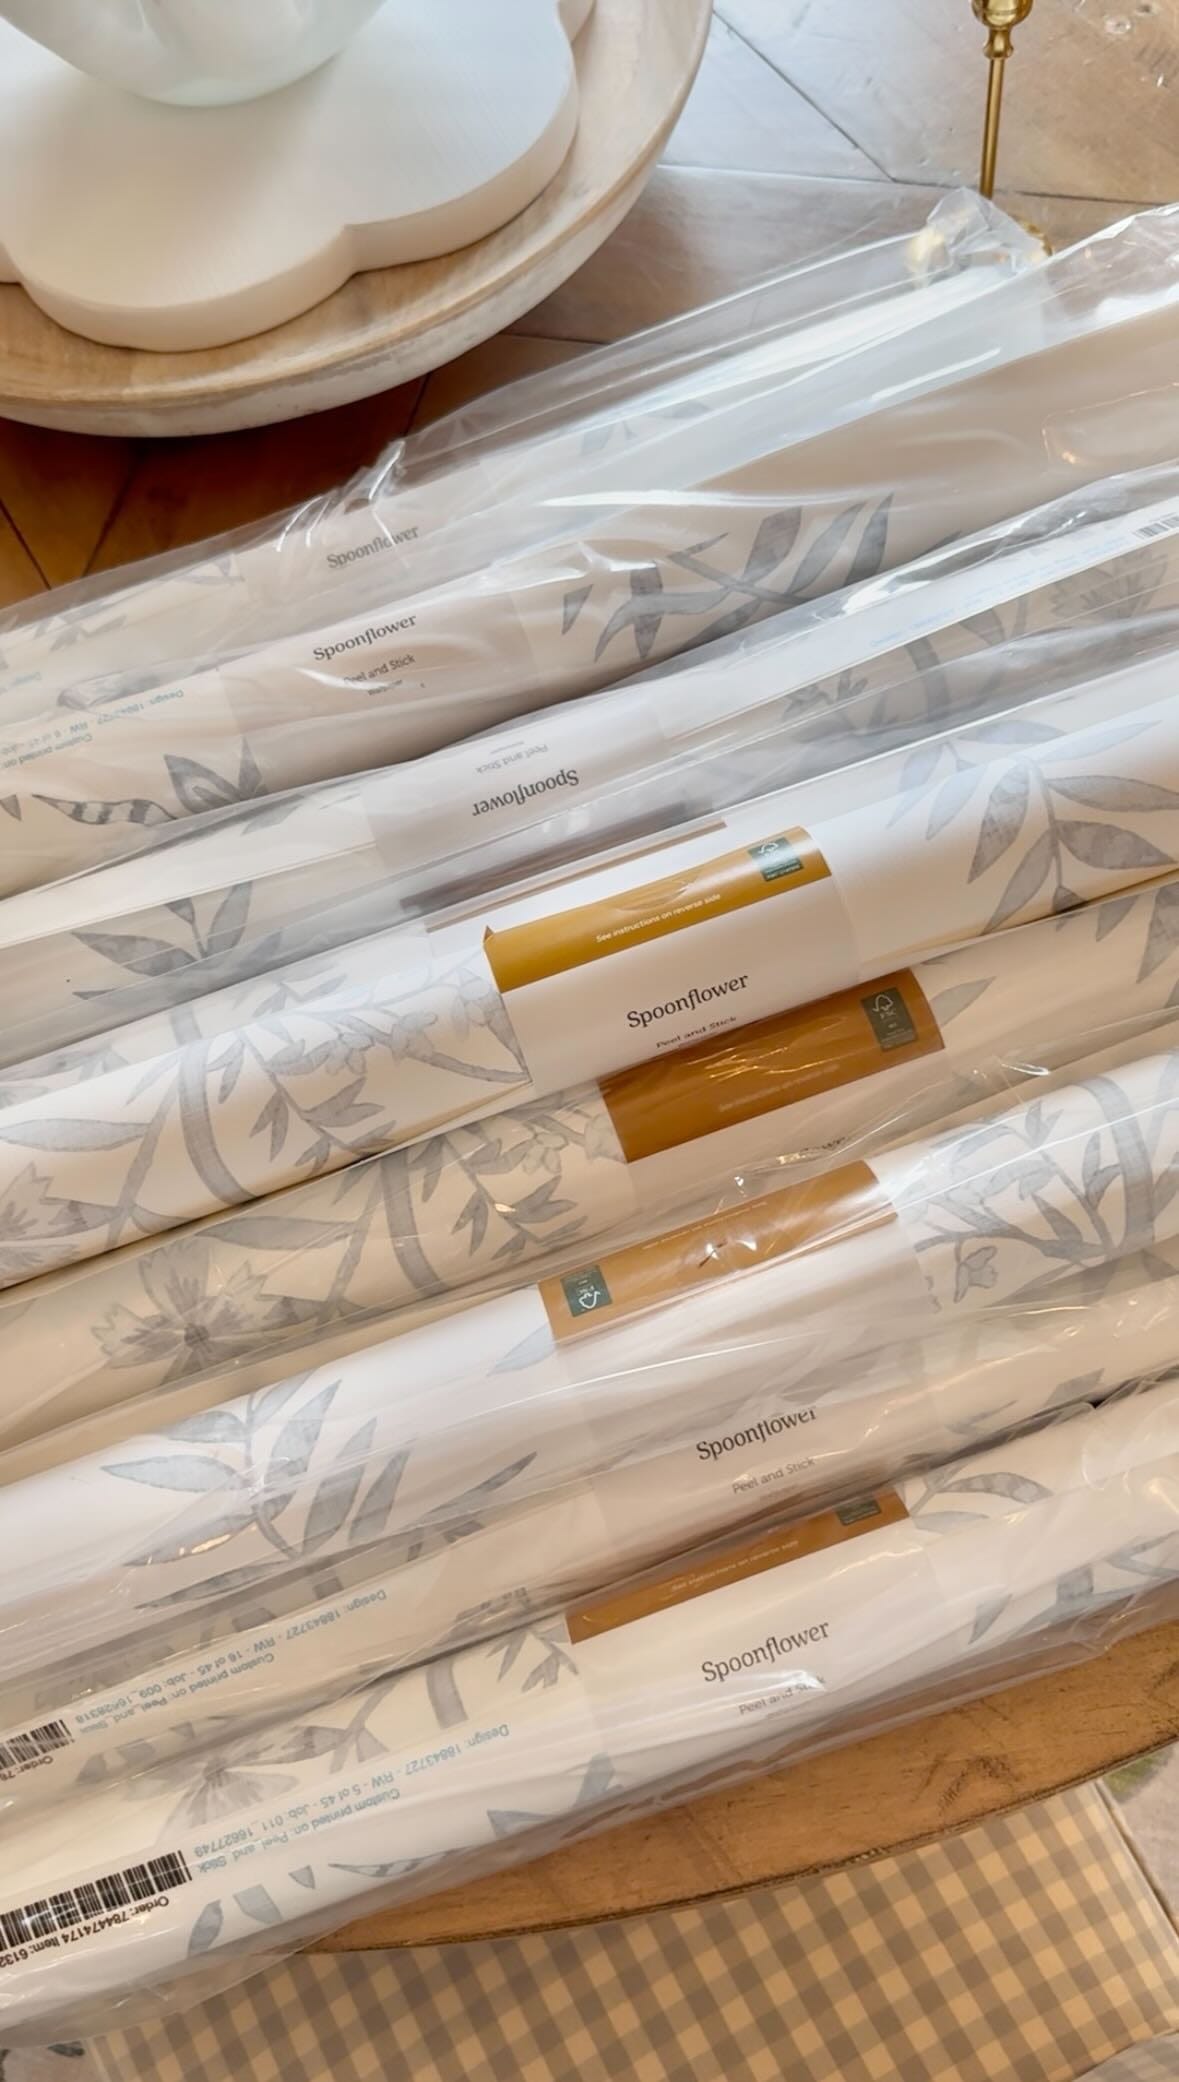
Spoonflower has tens of thousands of designs available in multiple formats — including peel & stick, which is what we used.
For a true forever home, I would likely opt for traditional paste wallpaper. But for our current townhome — which has an expiration date as our family one day hopefully grows — peel & stick was the perfect compromise. If we ever decide it impacts resale value? It removes cleanly.


What I especially loved about ordering from Spoonflower:
Hefty sample sizes (non-negotiable when trying to determine scale and repeat)
Coordinating fabric options (dangerous information for someone who romanticizes matching drapery or upholstery)
An intuitive filtering system for sifting through the library of selections — I narrowed by:
Colors: neutrals, greens, blues
Style: their “preppy” collection
Pro tip: If your Pinterest algorithm is well trained, search “Spoonflower wallpaper” there. It’s shockingly effective at pulling tailored selections.
We ultimately chose patterns that complemented our trim paint — Sherwin-Williams Gray Screen.

For our dining room, we selected NT Soft Blue Pallavi by Danika Herrick:

For our primary bedroom, we selected Leafy Trellis in French Blue on White Copy by Danika Herrick:

Here are some others we nearly selected:


From top left clockwise: Soft Blue and Greens on White Emma Stripe by Danika Herrick; Large Soft Blue on White Charlie Stripe by Danika Herrick; Graham Blue Stars by Heights Design Studio; Custom Butterscotch Green and Dusty Blue on Cream Elsie’s Garden by Danika Herrick
Tools You Actually Need
Spoonflower’s wallpaper calculation tool (+ 10% extra for safety)
Scissors
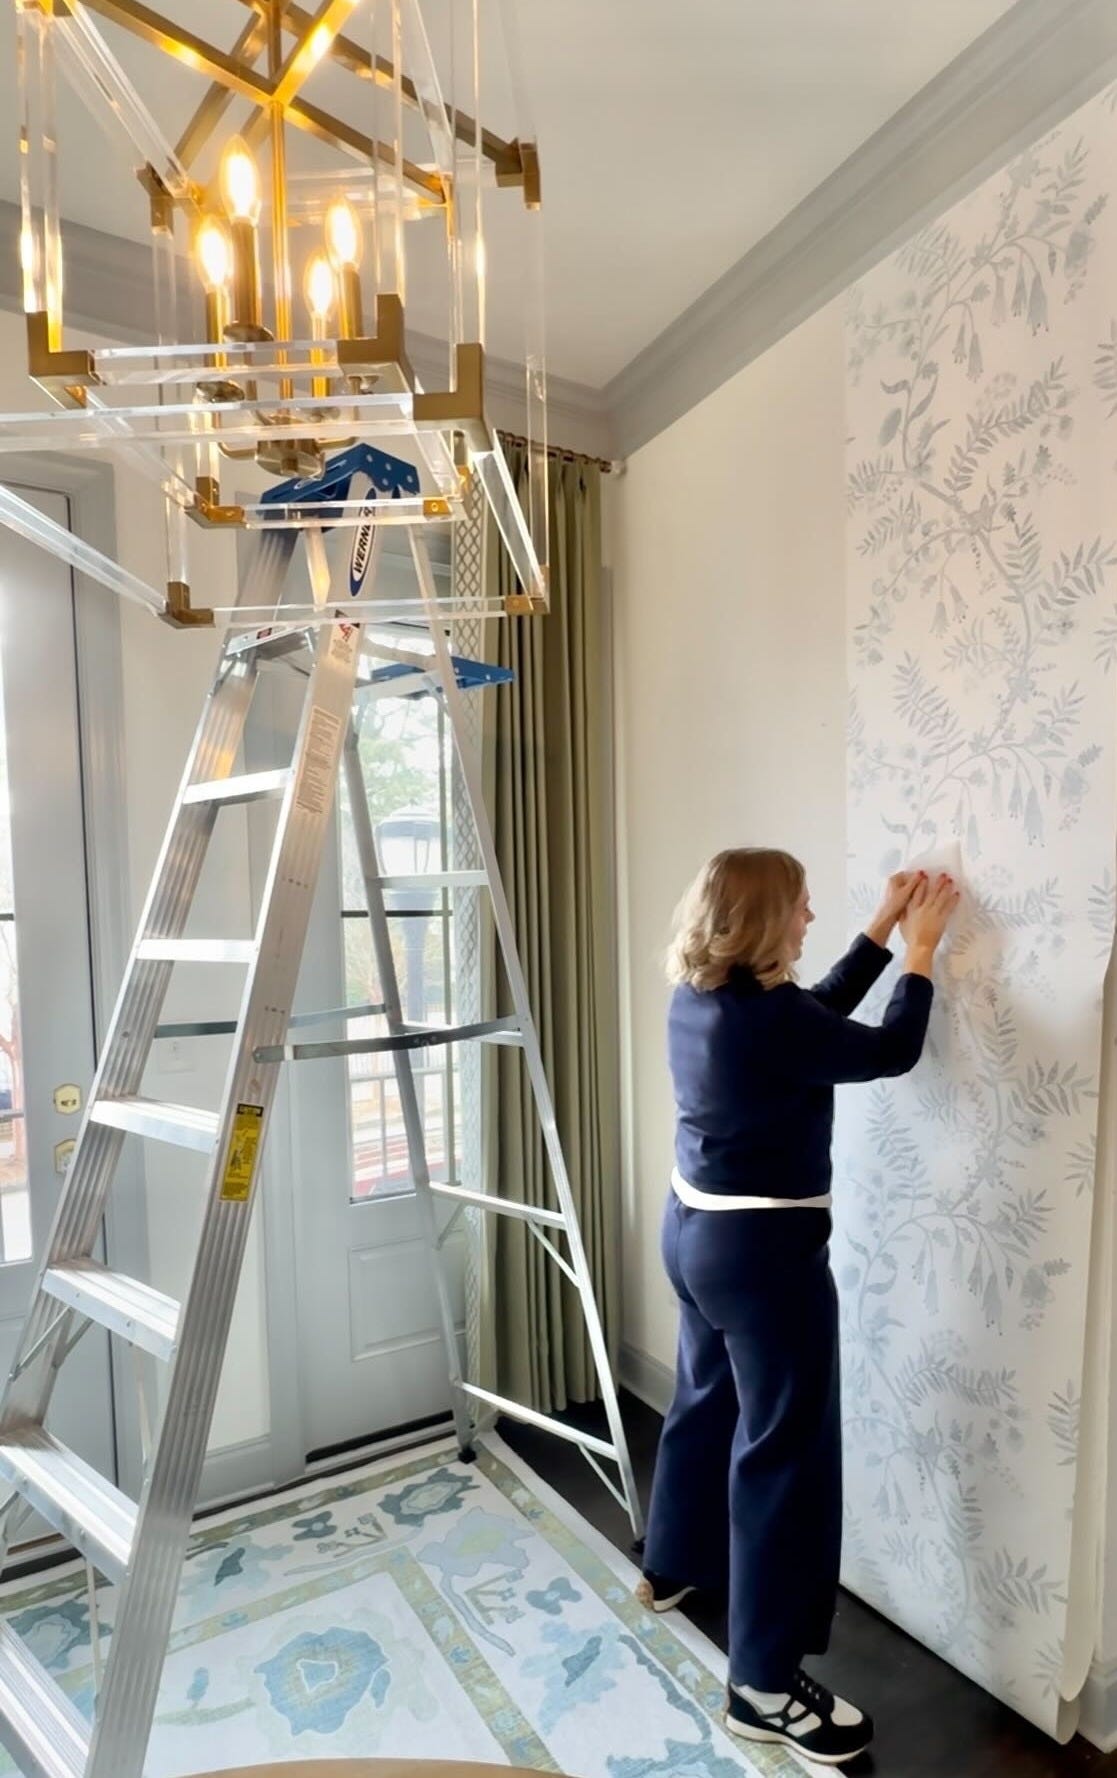
A truly giant ladder (you need to get up in there – I used an 8 foot)
Comfy clothes – this is physical work. Here’s what I wore over my install days:


Patience!!!
The Steps (Peel & Stick Install Overview)
Based on Spoonflower’s installation guide and our real-life experience, here’s the order of operations:
1. Measure (Twice. Actually Thrice.)
Measure full wall height and width – use the tallest wall height for all.
Do not subtract windows or doors.
Patterns require continuity, and panel alignment is everything. Order based on total wall space, not negative space.
2. Order Your Paper
Use Spoonflower’s calculator.
Add 10% extra for pattern matching, mistakes, and emotional security.
3. Prep the Walls
Clean surface thoroughly
Ensure walls are fully dry
Smooth out debris
If freshly painted, allow adequate cure time
Light texture is workable, but heavily textured walls or certain paint finishes can increase bubble risk (We learned the hard way. Le sigh.).
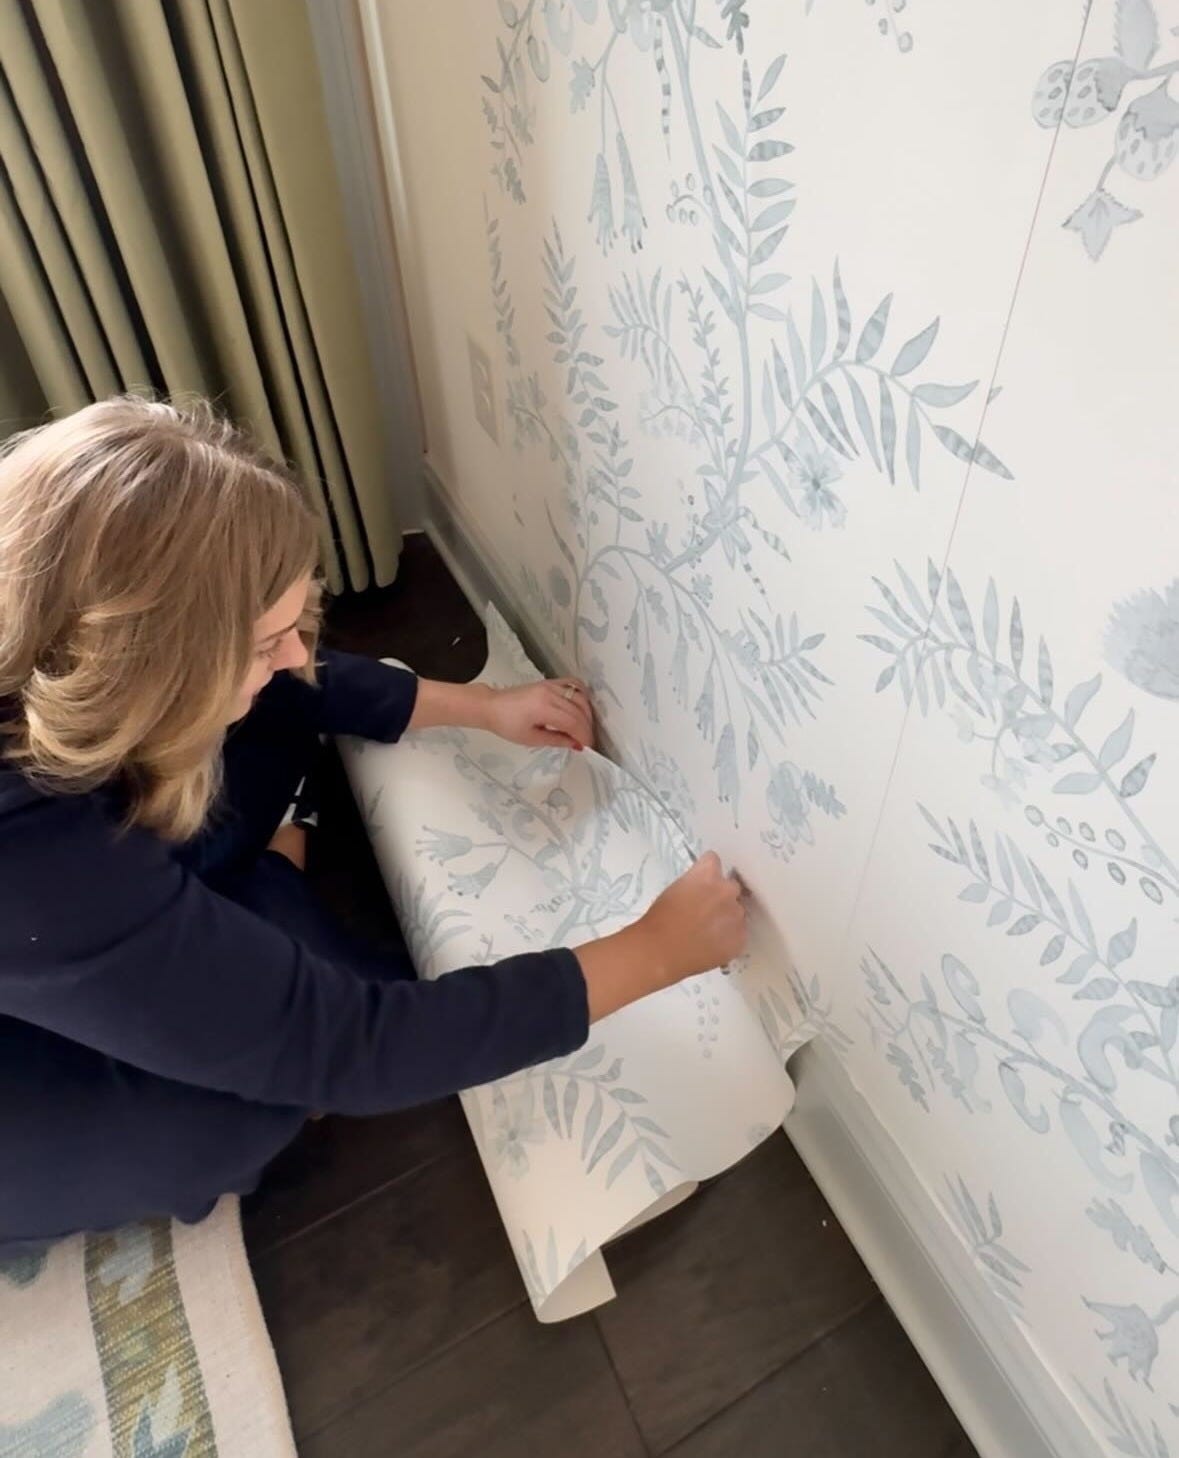
4. Start at the Top
Use a level or plumb line to create a straight vertical starting point
Peel back just the top portion of the backing
Align carefully and press into place
Do not remove the entire backing at once!!!
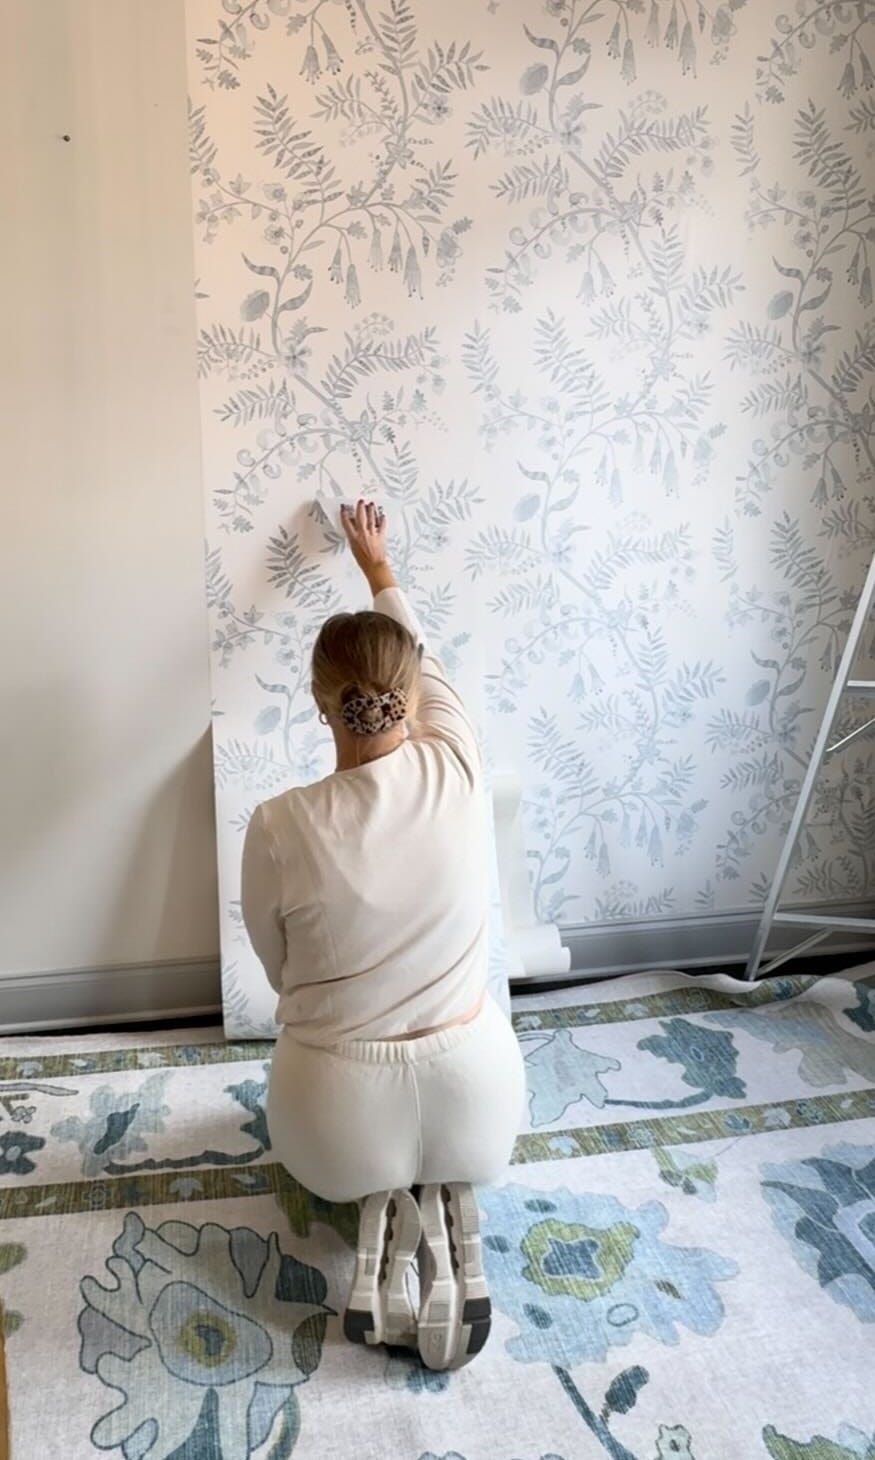
5. Smooth As You Go
Work from top to bottom
Use your smoother tool to push air outward
Move slowly
Peel more backing gradually
If bubbles appear, gently lift and reapply. Peel & stick is forgiving.

6. Pattern Match Carefully
Align each panel before fully committing pressure.
Lattice proved easier than expected, despite my fear it would be chaotic given how imperative it was that the panels aligned. The more organic vine pattern? Surprisingly harder to keep on repeat!
7. Trim Excess
Use a sharp hobby knife along ceiling and baseboards for a clean finish.
Tips I Learned the Hard Way
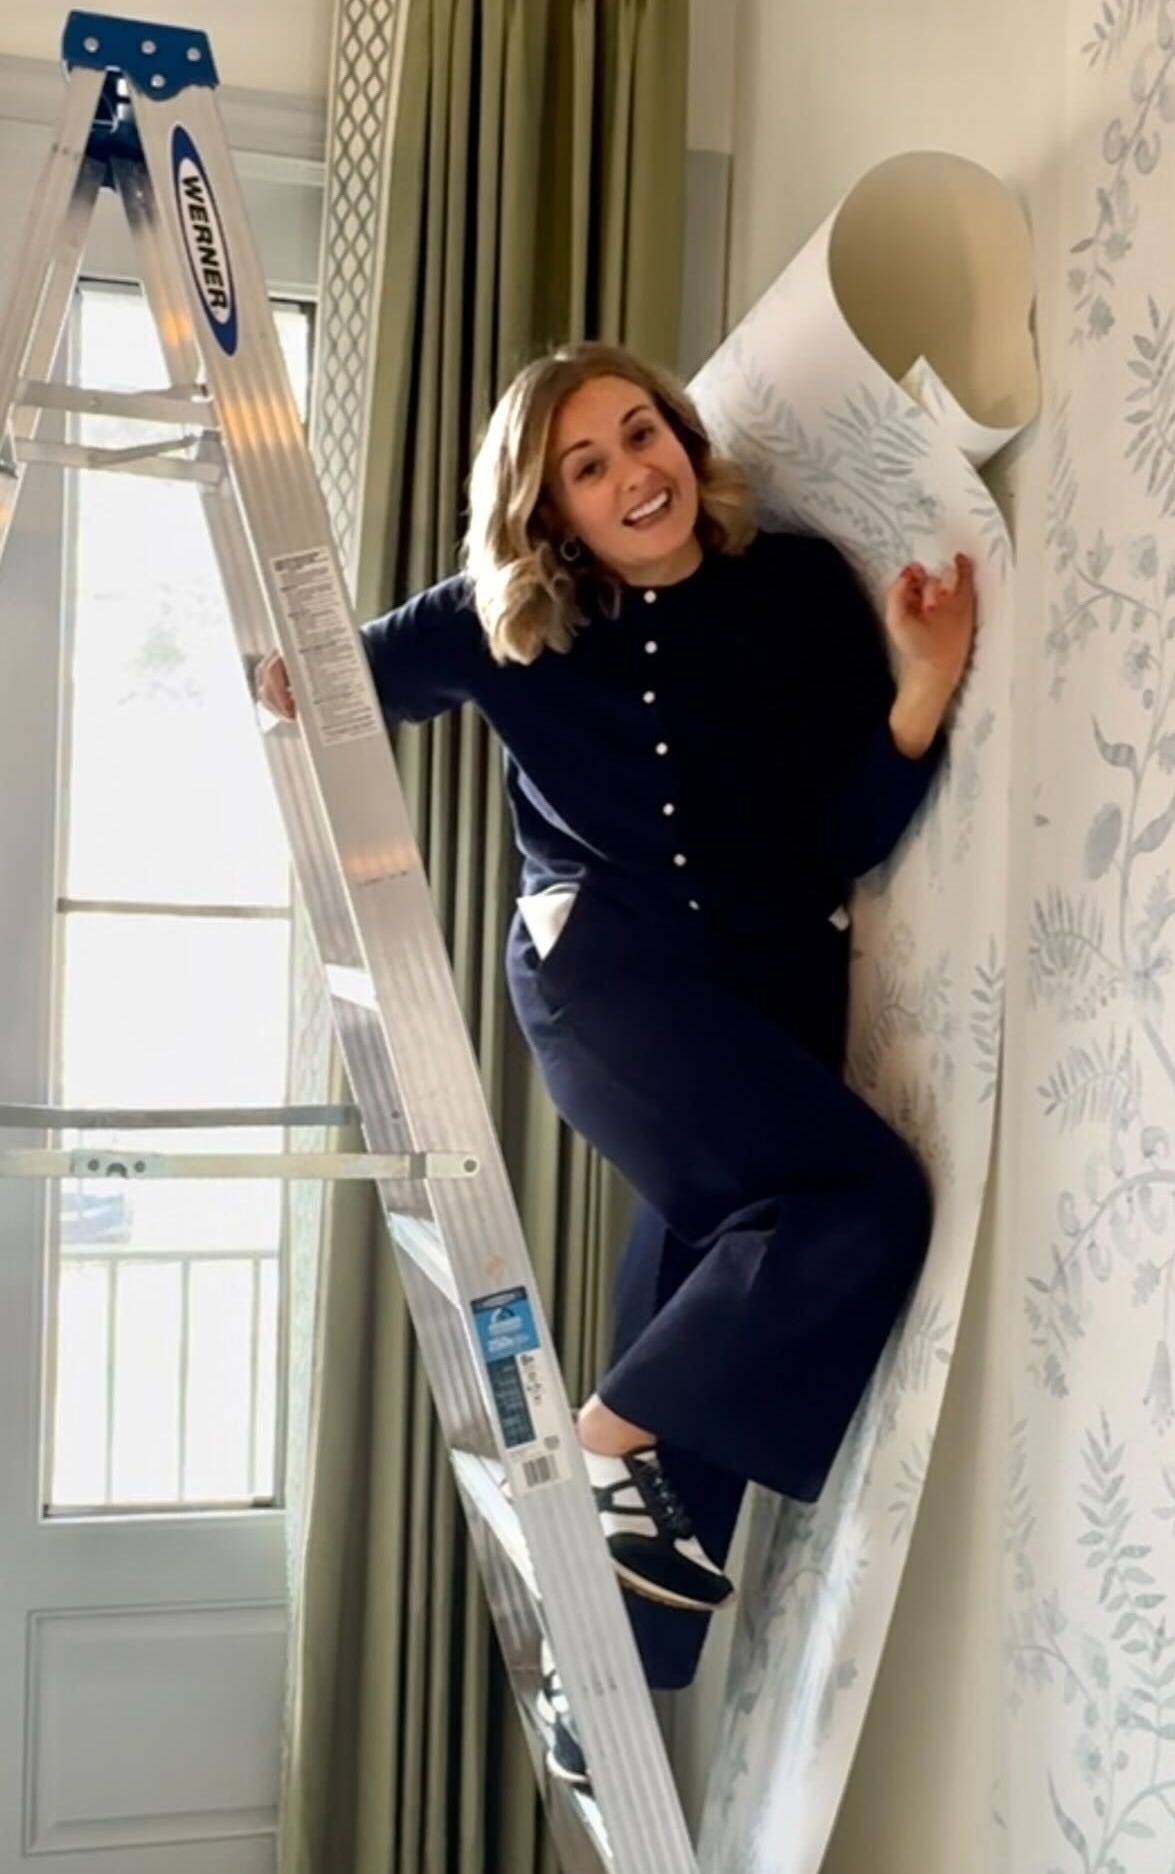
TAKE BREAKS. I installed two panels at a time and then would take a break. Yes, it extended the work to 30 minute spurts over 4 days, but the physical and mental resets are critical to a job well done with attention to detail.
Corners are the biggest pain in the neck.
You will have to revisit panels to smooth bubbles — especially with textured walls or flat paint finish.
Choose wallpaper with a base tone complementary to your wall color. It disguises minor misalignments. :)
The Verdict
Dining Room


Primary Bedroom


I do not intend to make DIY a habit of mine, but, let me say in the words of Elle Woods: “We did it!”
Is it perfect? No. But it is an instant injection of charm, and character, and genuine, heart-fluttering beauty into our home. And, above all, I had some fun along the way as I surprised myself with a new skill! As cliché as a 90s rom-com heroine finding herself as she paints the walls with splatter overalls, staring wistfully at the possibilities before her (metaphorically and design-ly) is, I had a ball transforming our space as I danced and sang along to Maisie Peters and cranked through audiobook memoirs. I also am so proud of myself for trying an activity completely out of my comfort zone.
If money is no object, or if you are someone who will break into a hot sweat even just imagining your mother-in-law inspecting a slightly imperfect corner, hire your professional installer and sip something sparkling while she works her magic. But if you’d rather allocate that budget elsewhere or can live with tiny human evidence of effort, it is absolutely doable with research, patience, and a tall enough ladder (I cannot emphasize this one enough!).
One week in, the peel & stick is holding beautifully. We did have to revisit a few bubbles (flat paint finish has been our foil), but overall it’s a low-impact, removable option that’s ideal for renters or non-forever homes.
Our dining room now feels layered and intimate. Our bedroom feels like a jewel box. And perhaps the most unexpected endorsement of all? Carter — former anti-wallpaper lobbyist — went to be the first night grinning, saying he felt like he was “sleeping inside a Christmas present.”
Which begs the question: Which room should I do next?